Watch our step by step video tutorial on how to sign up with Bluehost and install WordPress!
Click here to get your hosting service set up with Bluehost and then use our tutorial below for simple and easy to follow directions. We are going to teach you how to sign up with Bluehost, how to install WordPress to build your site, and how to prepare to launch your blog.
If you have been looking for a host where you can start a successful WordPress blog, then Bluehost is your best option! We have personally used Bluehost as our host for a long time and have loved their service!
Blogging has been such a great experience for us! We are able to do what we love and make a part-time income to help support all 3 of our families. We are able to work from home while our kids are napping or when we have free time. We can travel whenever we want and just work from our laptops. We are absolutely loving it and our only regret is that we didn’t start our blog sooner!
Anyone can create a successful and profitable blog! Purchasing the Bluehost hosting service was our first “big” expense that we invested into our blog when we first started. We were able to make the money back very quickly. Paying for this hosting service was worth every penny and we are confident that when you purchase it you will be able to make your money back quickly also!
Bluehost was named one of the top web hosting services in 2016! You can get started with them for as low as $3.45/month! If you use our link, you will also get a free domain ($15 value). They also have a 30-day money back guarantee but you probably won’t need it because we are confident you will be happy with their service!
Another good reason for using Bluehost is that if you plan on monetizing your blog, you need to be self-hosted. You can read our “5 Ways to Make Money Blogging” post to learn more about monetization. Using WordPress to build your blog with the Bluehost service makes your site look very professional. We will get into more details later in this post about the look and theme of your blog. For the first few months after we started our blog we were actually using a free website builder but once we switched to being self-hosting on Bluehost and building our site with WordPress our blog looked WAY more professional and we started making money. Building your site with WordPress and being self-hosted is definitely the way to go!
We really do love working with Bluehost and know that they are one of the best! Here is why:
- It is so easy to use and ANYONE can build their own website. Our simple to follow tutorial below will teach you how!
- They offer great service with 24/7 support.
- It is simple to start building your website with WordPress (free to install on Bluehost).
- It will allow you to start making money online because you are self-hosted!
- Low monthly price of $3.45/month which is very affordable!
- FREE DOMAIN!
- 30 day money back guarantee.
- The look and feel of your website will be professional.
If you ever have any questions about getting started with Bluehost or setting up your blog, send us an email to Contact@SincerelyJean.com. We would love to help you!
Click here to get started with Bluehost now!

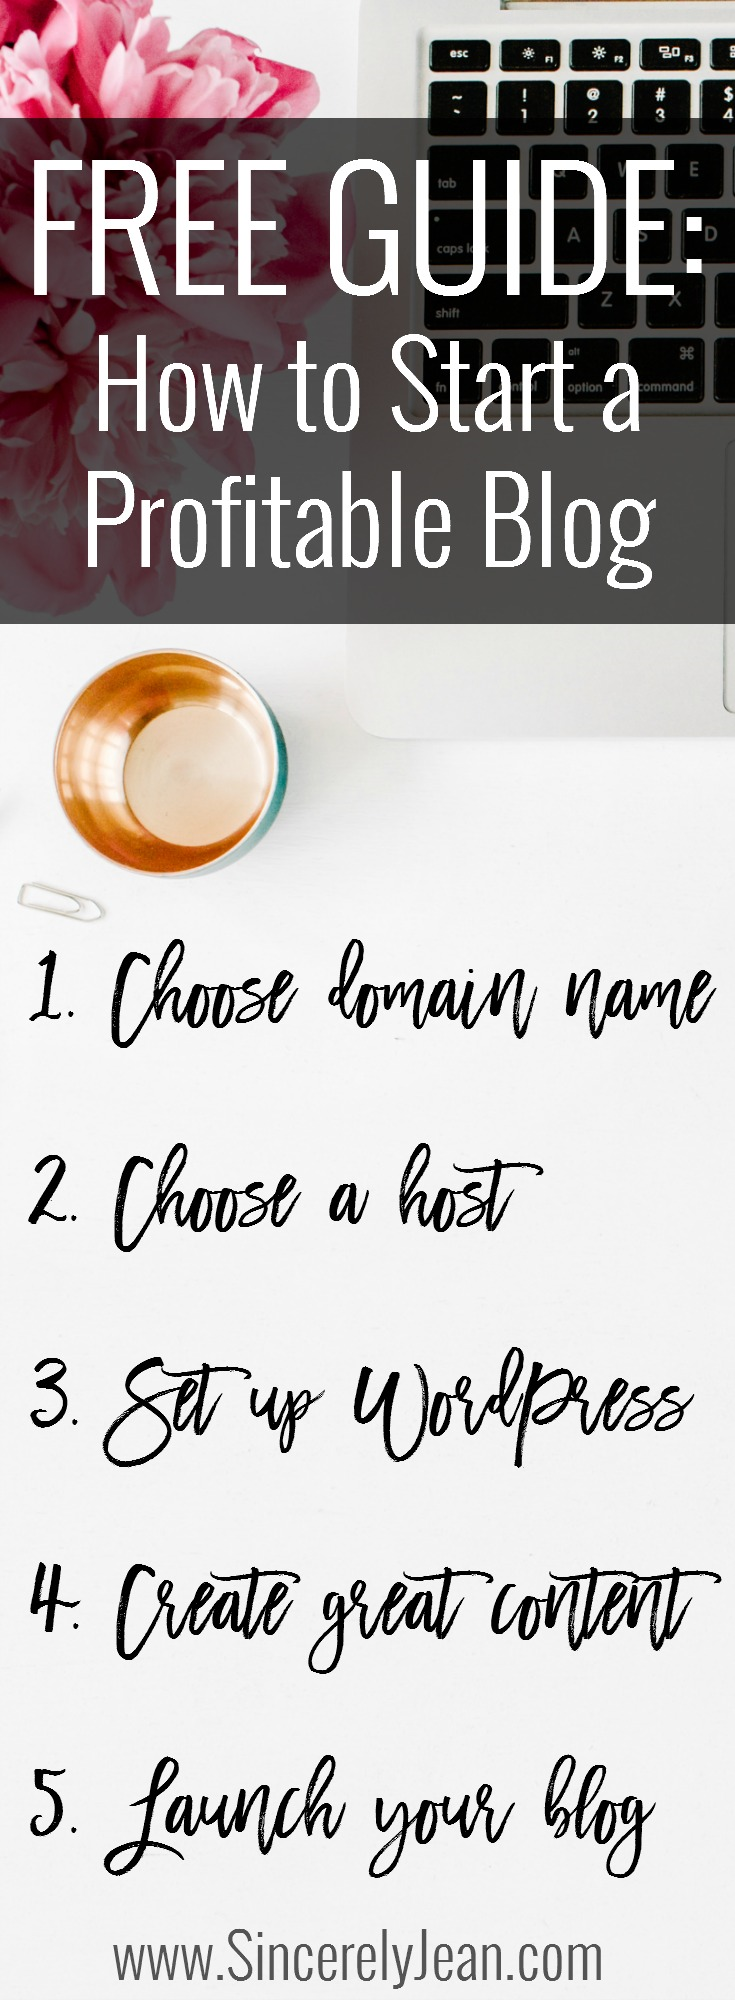
In this tutorial, we are going to show you how to set up your WordPress blog on Bluehost in 5 steps. The steps are:
- Decide on your blog/domain name
- Choose a host
- Set up WordPress and design your blog
- Create great content
- Launch your blog
Step #1- Decide on your blog/domain name.
It should be something that you will be happy with for a long time. We took a while to decide on Sincerely Jean. We had several other ideas. We even considered spelling sincerely differently but ultimately decided that Sincerely Jean would be best and so far we love it! (Jean is all of our middles names!) What things describe you or the things you want to write about? What are you passionate about? Try making a list of words and phrases and starting from there. We recommend getting a .com domain! Use this tool to see if your domain is available now!
Step #2- Choose a host and buy hosting service.
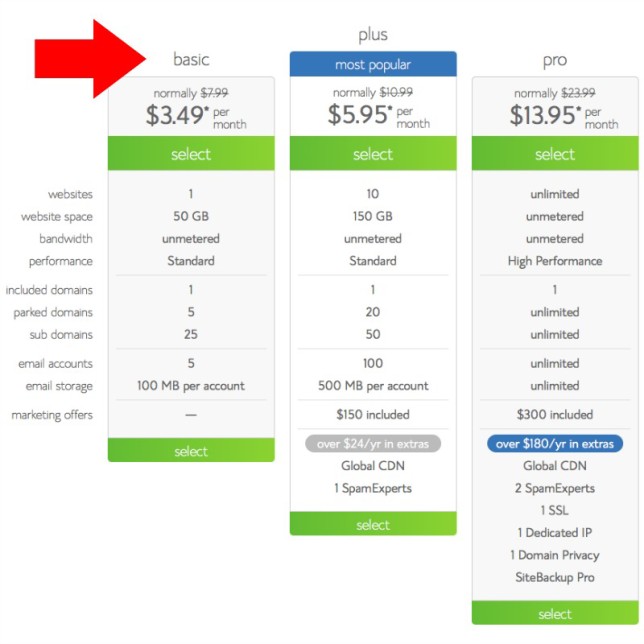
If you plan on monetizing your blog then you need to be self-hosted. As we talked about earlier in this post, we use Bluehost as our host. We discussed many reasons why we like them including low monthly price ($3.45 a month), free domain, 24/7 support, professional look, and more. When you are just getting started, the BASIC plan will work just fine.
Steps:
- Go to Bluehost and click on “Get Started Now”.
- Click “Select” on the package you want to purchase.
- Type in your domain and click “Next”.
- Fill in your information to create your account. The only extra at the bottom that we recommend is the “Domain Privacy Protection”. This will keep your contact information private. You can uncheck the other extra boxes.
- Click the “I confirm” box after reading the terms and click “Submit”.
Step #3- Set up WordPress and design your blog!
Once you sign up with Bluehost, you can log into your account and install WordPress to design your blog. WordPress is very user friendly and there are tons of helpful tutorials.
Steps:
- Click “WordPress tools” in the main menu.
- Choose the domain you plan to install WordPress on. It will ask you to fill in your site title, username, password, and email. Make sure the password is something very secure and we would recommend saving it in a safe place in case you ever forget it.
- Click “Install WordPress”
- Open a new browser and go to example.com/wp-admin and log in with the username and password you just created
Watch our step by step tutorial on how to install the Genesis framework and child theme on WordPress!
Framework and Theme
After you download WordPress, you need to decide on a framework and theme. A framework is not absolutely necessary to have a website but it is highly recommended! Think of a framework as the back end of your site, all of the things that go on behind the scenes. There are a few frameworks out there but Genesis (by StudioPress) is the best! Here is why:
- Search Engine Optimization
- Responsive HTML5 Designs
- Unlimited Everything
- Airtight Security
- Instant Updates
- Customizable and Fast
- Widgets & Layout Options
- Developers You Can Trust
Once you have your framework, it is time to make your site look pretty. This is where a theme comes in. A theme is the look and cosmetic make-up of your blog. We use a theme called Foodie Pro. In order to use this theme, you have to have the Genesis framework so we purchased it as a package that includes both the Genesis Framework and Foodie Pro theme. You can find that package HERE. We love the Foodie Pro theme because it is simple, organized, and pleasing to the eye. It is also very user friendly when designing your layout! You can check out all of the themes that go with the Genesis Framework HERE. A framework and premium theme can be pretty pricey (around $130 together) so if that is not in your budget, there are several free themes you can use. If you are looking to monetize your blog and run it as a business we do recommend spending the money upfront for the Genesis framework and theme! It will save you money in the long run! We started out on a free theme and then once we decided to move to Genesis we had to redesign out website. If we could go back we would have purchased the Genesis framework and theme from the very beginning!
If you aren’t exactly sure how you want your layout/design to look, we would recommend browsing the web and looking at other websites and take note of the elements that you like. Try to implement these elements into your site and make it your own.
Style Guide
Don’t underestimate the power of a strong brand/style guide! This is very important. As you grow, people will start to recognize you just by your branding. We recommend choosing 2 fonts (one fun and creative and the other plain) and 3-4 colors (get the exact color code). Use these on EVERYTHING that you do! People will start to recognize you, especially on Pinterest. We also recommend making a watermark that you can put on your photos.
Step #4- Create great content with great pictures.
Shortly after starting our blog, we purchased professional cameras to improve the quality of our photos. You don’t have to spend all of your money on a camera. We actually bought used ones that were still good quality. Having great photos are very important when blogging! This is something that we have definitely learned over time! The main reason is because people on Pinterest want to see good photos! Pinterest is our largest source of traffic! (To learn how to increase your Pinterest traffic read our post HERE.)
Try to be unique in your content. This is what helps set you apart from other bloggers! We always try to put our own spin on things to make our posts more unique. Something that helps us stand out is our 5 ingredient recipes. They have been featured on MSN.com, PureWow.com, and our local News 3 Las Vegas. We actually have an entire ecookbook, “30 5 Ingredient Dinner Recipes” that our readers can download for free.
Try to post at least 3 times a week to keep your readers engaged. We would also recommend having 1-2 months of posts ready before launching your blog. Believe us, it will make your life a lot easier and less stressed!
Recommendations: (view our full recommendations page HERE)
Canon EOS Rebel Camera: All 3 of us have a version of the Canon EOS Rebel camera. Click HERE to see a very helpful chart comparing Canon EOS cameras. We purchased our cameras used from Craigslist and garage sales! We were able to save a ton of money and they still work great!
Canon EF 50mm f/1.4 Lens: We are obsessed with this lens! We love the aperture range which is essential for good food photography! Again, we found ours used on Craigslist and paid a fraction of the price.
Food Blogger Pro: For all food bloggers, we recommend signing up for Food Blogger Pro by the owners of the Pinch of Yum blog! They are the cream of the crop when it comes to food blogging! We LOVE Food Blogger Pro and it has helped our food photography and blog growth a TON! Make sure to get your Food Blogger Pro membership coupon!
Step #5- Launch your blog!
This is a big deal and you should get excited for it! We were very excited to launch our new site and we even did a sister photo shoot which you can see HERE for our first post! We broadcasted our launch on all of our social media and had very high traffic that day. Announcing your launch on social media lets others that you are already connected with know that you are starting something new! They are most likely going to support you and check out your new site! So get excited and get others excited when you launch!
Make sure you read our “5 Ways to Make Money Blogging” post to learn more about monetizing your blog!
If you have any questions, please feel free to email us at Contact@SincerelyJean.com.
We hope this helps you with starting your own blog! Best of luck to you!
Sincerely,
shari, tami, & patti
PIN FOR LATER:


