• Skip to primary navigation
  • Skip to main content
  • Skip to primary sidebar
  • Skip to footer

Sincerely Jean

The Sweet Things In Life

  • home
  • about
    • about
    • Recommendations
    • advertising
    • press
    • featured on
    • privacy policy
    • Terms & Conditions
    • we believe
  • recipes
    • Free eCookbook
    • 6 Week Meal Plan and Grocery List
    • 5 Ingredient Dinner Recipes
    • Slow Cooker Recipes
    • breakfast
    • appetizer
    • Soup
    • dinner
    • dessert
  • diy
    • crafts
    • projects
  • Lifestyle
  • Free eCookbook
  • Blogging
    • Blogging Ecourse
    • Recommendations
    • blogging tips
  • Shop

Repurpose a Wood Sign Tutorial

June 2, 2015 By sincerelyjean

This post may contain affiliate links.

Picture

 
Todays tutorial is going to show you how to repurpose a wood sign.  You can use one you already have or buy a cheap one from a garage sale or thrift store.  

Picture

Here is the before picture.  I found this at a garage sale for $1.  

The other supplies you will need are:
1. Paint-I use all purpose acrylic paint that you can get at any craft store.  
2. Foam paint brushes
3. Vinyl (words and/or design)
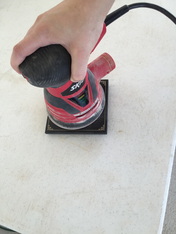
4. Sander
If you want to add a distressed look you will also need:
5. Sandpaper
6. Stainer wood finish
7. Paper towels


Steps:
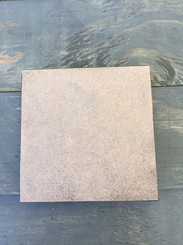
1.  Use a sander to take off all of the old paint.
Picture

 
Picture

 
2. Paint the wood with the base color.  I used white and did 2-3 coats.  Let it dry.
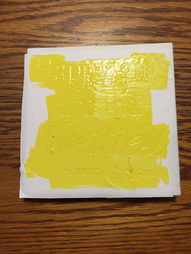
3. Place the vinyl over the wood.  I didn’t use transfer paper because the letters were pretty small.  I just put the outline of the words right onto the wood.  
4. Paint over the vinyl with the color of the letters.  I used yellow and did 2 coats.  Let it dry.
Picture

 
Picture

 
5. Remove vinyl after it is dry.  If you don’t want a distressed look then you are done!  If you do want a distressed look then here are the extra steps.

Extra steps for distressed look:
6. Use sand paper to sand the wood evenly and in the same direction.  Then sand harder around certain areas and letters to remove the paint to give it that distressed look. 
7. Time to stain it.  Make sure to use the right color of stainer because once you apply it there is no going back.  You might want to try it on an extra piece of painted wood before applying it to your sign just to make sure you are happy with it.  I used the “Special Walnut” color of the Minwax brand.  **It will always look darker when you first apply it.  After it dries it lightens up quite a bit.**  Use a foam paint brush to apply the stainer.  Be careful not to apply too much, a little bit goes a long way.  Use paper towels to remove the excess.  Let the stainer dry completely.  I usually let mine dry overnight.

Picture

BEFORE
Picture

AFTER
 
Sincerely,
 
shari jean
 
[easy-social-share buttons=”facebook,twitter,pinterest,mail” morebutton_icon=”plus” counters=0 style=”icon”]

Filed Under: crafts, diy

Previous Post: « Healthy Banana Pancakes
Next Post: Secret Ingredient in Chocolate Chip Cookies »

Reader Interactions

GET OUR FREE ECOOKBOOK!

Primary Sidebar

Hey Lovelies! Thanks for stopping by. My name is Patti Jean Hatch and I am a lover of all things sweet in this life! I hope you enjoy my fun recipes, family life and DIY projects. Learn more about me HERE and find me on social media!
  • Bloglovin
  • Facebook
  • Google+
  • Instagram
  • Pinterest
  • Twitter

Hundreds of simple recipes and DIY projects!


SEARCH MY RECIPES & DIY!

Sincerely Jean Free eCookbook
GET OUR FREE ECOOKBOOK!

Learn How to Start Your Own Blog Here!

                       READ MY FREE GUIDE!

Sincerely Jean Press

POPULAR POSTS

  • Post thumbnail

  • Post thumbnail


Follow me on Pinterest!


Recent Posts

  • Holiday Baking With My Boys
  • Kenzie’s Blessing Day
  • Fathers Day Celebrations
  • Summer BBQ Recipe Guide
  • Tips for Keeping My Hair Hydrated + Healthy

Categories

  • Lifestyle
  • diy
  • recipes
  • other
  • blogging tips
  • fitness

Footer

GET OUR FREE ECOOKBOOK!

Follow us on Pinterest!

Copyright © 2025 · Foodie Pro Theme On Genesis Framework · WordPress · Log in